Themed Fabrication Design
Spla-table
Inspired by the Nintendo game Splatoon, the forms of this table take on the properties of paint, stretching and splattering. The two colors of the table represent a mode in the game called turf war, purple versus green.
20" x 20" x 30"
November 2022

Sketches


A few different variations of what I wanted the table to look like. I ended up deciding on sketch 3.
Cutting Out the Pieces

Wood before milling

Table aprons

Aprons and tabletop

Table legs

Full scale pattern
Table Legs
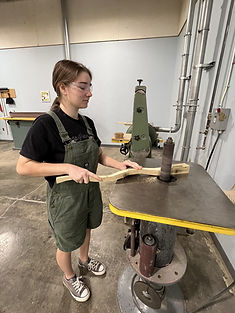
After cutting out the table legs, I used the multi-router to cut out mortises for the tenons. I cut out the curves of the leg on the band saw and used the spindle sander to soften the edges. After hand sanding them, the legs were ready to be painted.



Aprons
The aprons were the most complicated part of making the table. I had to make sure the mortises were all aligned perfectly so the aprons would be flush with the surface of table legs. I labelled the legs and aprons so I knew which ones went together. I also had to keep the placement of the mortises in mind when making the pattern for the aprons so the curve at the bottom wouldn't cut into them. I used the drill press to cut out the decorative shapes, and a file to smooth them out.


.jpg)
Tabletop
After cutting out the pieces for the tabletop, I glued them together and cut out the final shape on the bandsaw. I used a forstner bit to drill the holes on the edges. After sanding everything the tabletop was done.


Buttons and Tenons
To make the buttons, I cut the shape out on the table saw, drilled holes down the center, and used a countersink bit to fit the screws. For the tenons, I cut a strip of wood to the right thickness and made shallow cuts in them to more easily fit them into the mortises. I rounded off the edges using the table router then cut them to the right length for the mortises.


Painting and Assembly
Once everything was sanded, I put all the pieces together to make sure everything fit correctly. I used layers of spray paint to paint the pieces and a glossy clear coat as a finish. Once the pieces were completely dry I used the tenons and glue to attach the aprons and legs. I drilled holes into the tabletop and screwed in the buttons to join the tabletop to the aprons.


